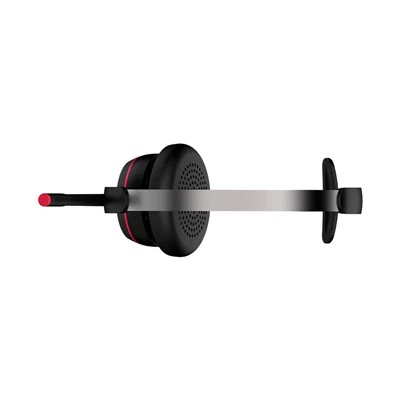
As a supplier of Single Ear Headset with Microphone, I understand the importance of ensuring that each headset we offer meets high - quality standards, especially when it comes to the microphone functionality. Testing the microphone on a single ear headset is a crucial step in the quality control process, and it also helps end - users to confirm that their newly purchased device is working properly. In this blog, I'll share some effective ways to test the microphone on a single ear headset with a microphone.
1. Initial Visual Inspection
Before conducting any technical tests, it's essential to perform a visual inspection of the headset. Examine the microphone for any visible signs of damage, such as cracks, loose wires, or bent components. A damaged microphone may not function correctly, and it's important to identify such issues early on. Check the connection between the microphone and the headset cable. Ensure that it is firmly attached and there are no signs of disconnection or fraying.
2. Testing on a Computer
One of the most common ways to test the microphone on a single ear headset is by using a computer. Here are the steps:
Step 1: Connect the Headset
First, connect the single ear headset with the microphone to your computer. Most headsets use a 3.5 - mm jack that can be plugged into the appropriate audio input and output ports on your computer. If your computer has separate ports for audio input (microphone) and output (headphones), make sure to plug the microphone part of the headset into the correct input port.
Step 2: Adjust Audio Settings
Open the audio settings on your computer. On Windows, you can usually access the audio settings by right - clicking on the speaker icon in the taskbar and selecting "Sounds". On a Mac, go to "System Preferences" and then click on "Sound". In the audio settings, select the single ear headset as the input device for the microphone.
Step 3: Use a Voice Recording App
There are many voice recording apps available, both free and paid. For example, on Windows, you can use the built - in Voice Recorder app. On a Mac, the QuickTime Player can be used to record audio. Open the recording app and start a new recording. Speak into the microphone at a normal volume, saying something like "Testing, testing, 1, 2, 3". After a few seconds, stop the recording.
Step 4: Play Back the Recording
Play back the recording to check if your voice is clearly captured. Listen for any background noise, distortion, or low volume. If the recording sounds clear and your voice is audible, then the microphone is working properly. If there are issues such as low volume, try adjusting the microphone volume settings in the audio settings on your computer. If the recording is full of static or distortion, there may be a problem with the microphone itself or the connection.
3. Testing on a Mobile Device
Testing the microphone on a single ear headset with a mobile device is also straightforward. Here's how:
Step 1: Connect the Headset
Connect the single ear headset to your mobile device. Most smartphones and tablets have a 3.5 - mm headphone jack or support wireless connections via Bluetooth. If using a wired headset, plug it into the appropriate port on your device. If using a Bluetooth headset, pair it with your mobile device according to the device's pairing instructions.


Step 2: Use the Voice Recorder App
Most mobile devices come with a built - in voice recorder app. Open the voice recorder app and start a new recording. Speak into the microphone on the single ear headset, just like you did when testing on a computer. After recording for a few seconds, stop the recording and play it back.
Step 3: Evaluate the Recording
Listen to the playback to see if your voice is clear and there are no issues with the audio quality. Check for any background noise, distortion, or low volume. If the recording is of poor quality, try adjusting the microphone volume settings on your mobile device. If the problem persists, there may be an issue with the headset.
4. Using a Professional Audio Interface
For more accurate and in - depth testing, a professional audio interface can be used. An audio interface is a device that connects your headset to a computer and provides high - quality audio processing.
Step 1: Connect the Headset to the Audio Interface
Connect the single ear headset to the audio interface using the appropriate cables. Make sure to connect the microphone part of the headset to the input channel of the audio interface.
Step 2: Connect the Audio Interface to the Computer
Connect the audio interface to your computer using a USB or other compatible connection. Install the necessary drivers for the audio interface if required.
Step 3: Use Audio Software
Open audio software such as Adobe Audition or Audacity on your computer. These software programs allow you to record and analyze audio in detail. Set up the audio software to use the audio interface as the input device. Start a new recording and speak into the microphone on the single ear headset.
Step 4: Analyze the Recording
Use the audio software to analyze the recording. Check the waveform of the audio to see if it is smooth and consistent. Look for any peaks or dips in the waveform that may indicate problems with the microphone. You can also use the software's tools to measure the volume, frequency response, and other audio parameters.
5. Troubleshooting
If you encounter problems during the testing process, here are some troubleshooting steps:
- Check the Connection: Make sure that the headset is properly connected to the device. Try unplugging and plugging it in again to ensure a secure connection.
- Clean the Microphone: Sometimes, dirt or debris can accumulate on the microphone, causing issues with audio quality. Use a soft, dry cloth to gently clean the microphone.
- Update Drivers: If you are testing on a computer, make sure that the drivers for your audio device are up - to - date. You can usually update the drivers through the device manager on Windows or the software update feature on a Mac.
As a supplier of Single Ear Headset with Microphone, we are committed to providing high - quality products. If you have any questions about testing the microphone on our single ear headsets or are interested in purchasing our products, please feel free to contact us for procurement and negotiation. We look forward to serving you and meeting your audio needs.
References
- Audio Technology Handbook, various authors
- Mobile Device User Manuals
- Computer Audio Settings Guides